Whether you are planning to upgrade your multimedia unit or simply need to check the serial number on the chassis, removing the radio console on a Volkswagen Golf 5 is a simple operation that you can do yourself in about 5 minutes.
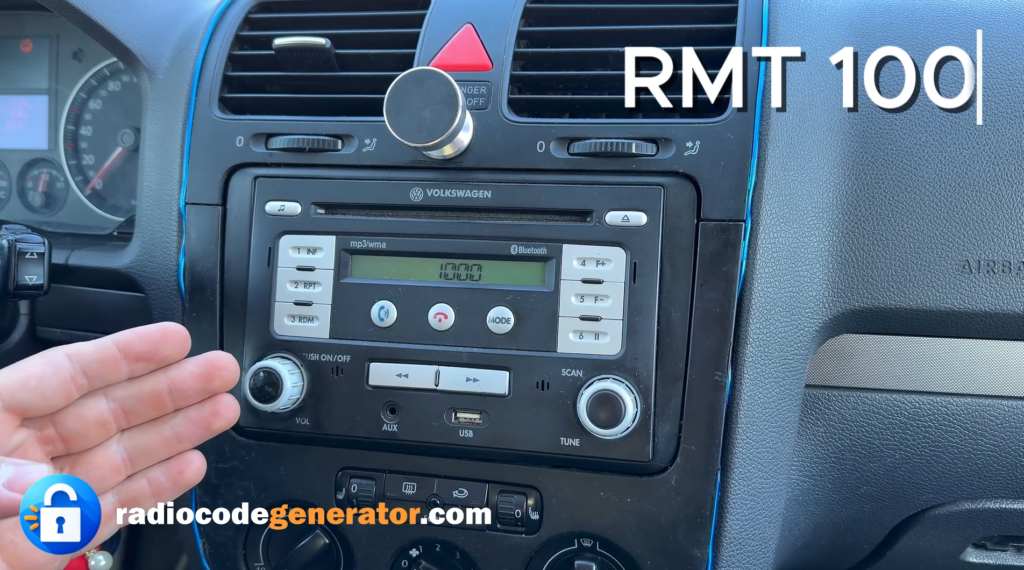
Although this guide is performed on a VW RMT 100 unit, the extraction method is identical for most Volkswagen models produced between 2004 and 2014.
🛠️ Required Tools
To avoid damaging the dashboard or the plastic trim, you will need:
- A T20 Torx screwdriver.
- Plastic pry tools – essential for not scratching the dashboard finishes.
 Essential tools | for safely removing the radio from a Volkswagen Golf 5
🚗 Compatible Models
This removal method is valid for a wide range of VAG group vehicles:
- Golf 5 / Golf 6
- Passat B6 / B7 / CC
- Polo (6R)
- Jetta / EOS / Tiguan / Touran
- Caddy / Transporter T5
The extraction process is compatible with the following radio models: RMT 100, RCD 210, RCD 300, RCD 310, RCD 510, RNS 315, RNS 510, and Premium 7.
📋 Step-by-Step Removal Instructions
1. Removing the top air vent or tray
The first step consists of removing the tray or the ventilation grille above the radio. Use the plastic tool to carefully release the clips, lifting the piece slightly to gain access to the hidden screws.
2. Detaching the front panel (Fascia)
After the top grille has been removed, you will need to detach the plastic mask (frame) that surrounds the radio. This is usually secured by clips and Torx screws. Use the T20 screwdriver to remove the screws that secure the decorative frame.
3. Removing the unit’s mounting screws
Once the frame has been removed, the radio unit will be visible, held in place by 4 T20 Torx screws located in the corners. Unscrew them completely and keep them in a safe place.
4. Extracting and disconnecting the cables
Pull the radio toward you with a firm but careful motion. Behind the unit, you will find the main plug (Quadlock) and the antenna cable. Release the plug locks to completely disconnect the head unit.
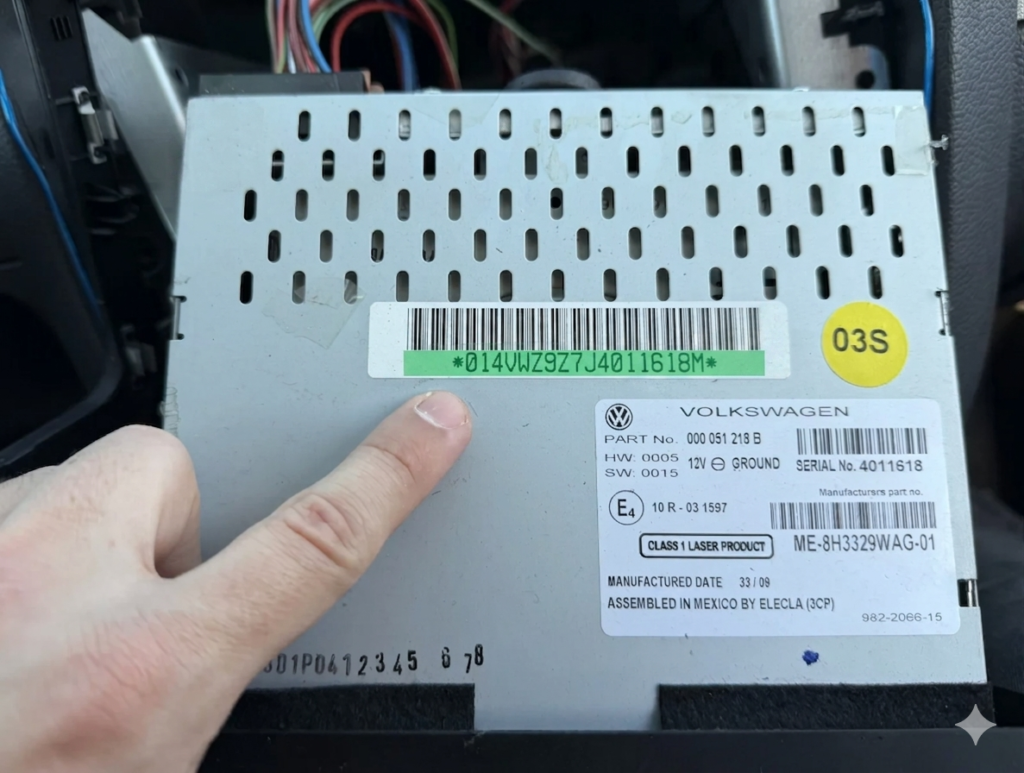
5. Identifying the serial number (VWZ)
If your goal was to identify the unit, check the white label stuck to the radio’s metal casing or the serial number engraved directly into the metal. The serial number will always begin with the letters VWZ (e.g., VWZ1Z2K1234567).
Conclusion
Removing the radio on a VW Golf 5 does not require advanced technical knowledge. With the right tools and a little patience, you can save the money you would have spent at an auto service, having full control over how your car’s console is handled.
Special thanks to the https://radiocodegenerator.com platform for this article.